Cup Cheesecake is a delightful treat that brings a twist to the classic cheesecake we all know and love. It’s a perfect dessert for anyone who craves something sweet but doesn’t want to spend hours in the kitchen. This individual-sized version is creamy, satisfying, and customizable to your taste. Plus, it’s quick to make with just a few simple ingredients! Whether you’re planning a cozy night at home or need a sweet bite to enjoy on the go, this mini cheesecake is sure to impress.
What You’ll Need for Cup Cheesecake
Before we dive into making this delicious dessert, let’s gather everything you’ll need:
- 60 g oatmeal (or coconut flour, chopped almonds, or crushed whole grain crackers)
- 1/2 teaspoon peanut butter (or 1/2 mashed banana)
- 100 g light cream cheese (or 0% Greek yogurt)
- 1 egg
- 1 tablespoon stevia or erythritol
- 1 pinch of vanilla extract
- Zest of half a lemon
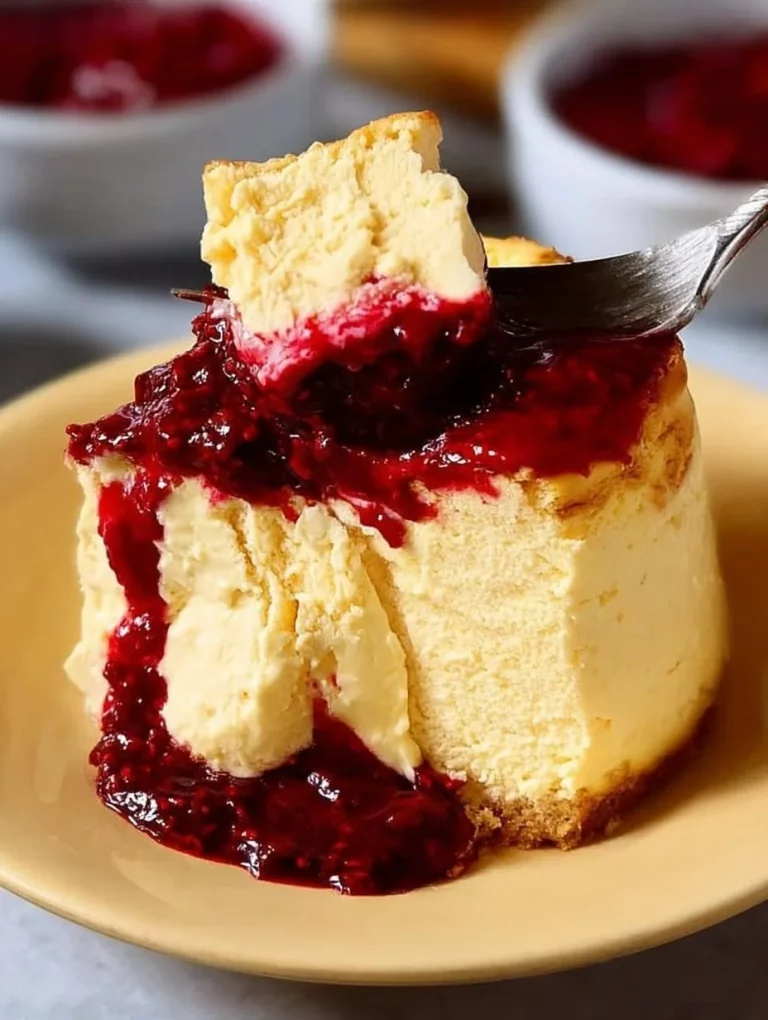
- 3 tablespoons sugar-free jam (optional)
How to Make Cup Cheesecake
Now that you have all your ingredients ready, let’s get started on making this tasty treat!
-
Prepare the Base: In a bowl, mix the oatmeal with the peanut butter (or mashed banana). Transfer this mixture into a microwave-safe cup and press it firmly to create a base.
-
Make the Cream: In another bowl, combine the cream cheese (or yogurt), sweetener, vanilla extract, egg, and lemon zest. Stir until you achieve a smooth, creamy mixture.
-
Assemble and Cook: Pour the creamy mixture over the base in the cup. Microwave on high (800 W) for about 90 seconds, checking every 30 seconds to ensure it sets but remains slightly soft in the center.
-
Cool Down: Allow the cheesecake to cool for a bit. Then, flip it onto a plate and add a layer of jam or a drizzle of peanut butter on top. Enjoy it warm or cold!
How to Serve Cup Cheesecake
Serving your Cup Cheesecake can be as simple or fancy as you wish! Once it’s cooled and flipped onto a plate, consider these serving suggestions:
- Serve it plain for a light treat or top it with a layer of sugar-free jam for extra flavor.
- Add fresh fruit on the side, like berries or sliced bananas, to balance the sweetness and add some color.
- Pair it with a dollop of whipped cream or a scoop of yogurt for a delightful contrast in textures.
Expert Tips for Cup Cheesecake
Here are some quick tips to help you make your Cup Cheesecake even more delightful:
- Flavor Boost: Experiment with different flavors by adding cocoa powder, cinnamon, or even a splash of your favorite liqueur for an adult version.
- Make It Gluten-Free: Use gluten-free oats or crushed gluten-free crackers for the base to cater to dietary restrictions.
- Store It Right: If you have leftovers, store them in the fridge in an airtight container. They’ll taste great for a couple of days!
Cup Cheesecake FAQs
Can I use different sweeteners in Cup Cheesecake?
Absolutely! You can use any sweetener you prefer, but remember to adjust the amount according to its sweetness level.
How long does the Cup Cheesecake last?
In the fridge, your Cup Cheesecake can last up to 2-3 days. Just make sure to keep it in an airtight container.
Can I make this dessert ahead of time?
Yes, you can prepare the base and filling separately and store them in the fridge. Assemble and microwave them just before serving for the best texture.
This Cup Cheesecake is a fun, easy dessert that anyone can whip up in just a few minutes. With its creamy texture and delicious flavor, you won’t be able to resist! Give it a try, and I’m sure you’ll be adding this recipe to your favorites! Enjoy your sweet creation!