Who doesn’t love the aroma of freshly baked bread wafting through the house? Imagine sinking your teeth into a warm slice of homemade bread, crispy on the outside and soft on the inside. If you’ve ever wanted to try your hand at baking bread but felt intimidated, fear not! With this simple recipe, you’ll be whipping up delicious loaves in no time. No fancy equipment required, just your trusty conventional oven and a few basic ingredients.
1. The Magic of Homemade Bread
There’s something special about homemade bread that sets it apart from the store-bought variety. Perhaps it’s the knowledge that you’ve put time and effort into creating something from scratch, or maybe it’s the satisfaction of knowing exactly what goes into your food. Whatever the reason, homemade bread always seems to taste better.
2. Gathering Your Ingredients
To embark on your bread-making adventure, you’ll need just a few simple ingredients:
- 4 cups (about 500 grams) wheat flour
- 0.4 ounces (about 10 grams) fresh yeast
- 0.4 ounces (about 10 grams) salt
- 1.3 cups (about 300 milliliters) warm water
3. Step-by-Step Instructions
Now, let’s dive into the bread-making process step by step:
3.1 Dissolve the Yeast
Begin by dissolving the fresh yeast in warm water and allowing it to rest for about 10 minutes. This step activates the yeast, allowing it to work its magic and leaven the bread.
3.2 Mix the Ingredients
In a bowl, combine the flour and salt, then add the yeast mixture. Use your hands or a wooden spoon to mix everything together until a shaggy dough forms.
3.3 Knead the Dough
Turn the dough out onto a lightly floured surface and knead it for about 10 minutes, or until it becomes smooth and elastic. This step is crucial for developing the gluten in the dough, which gives bread its structure and texture.
3.4 Let it Rise
Place the dough in a clean bowl, cover it with a cloth, and let it rest in a warm place for about an hour, or until it doubles in size. This allows the yeast to ferment and produce carbon dioxide, causing the dough to rise.
3.5 Shape the Loaves
Once the dough has doubled in size, punch it down to release any air bubbles, then divide it into portions and shape them into loaves. Place the loaves on a baking sheet lined with parchment paper and let them rise again for about 30 minutes.
3.6 Preheat and Bake
While the loaves are rising, preheat your oven to 220°C. Once the loaves have risen, bake them in the preheated oven for 20-25 minutes, or until they are golden brown and sound hollow when tapped on the base.
4. The Importance of Yeast
Yeast is the magical ingredient that makes bread rise. It’s a living organism that feeds on sugars in the flour, producing carbon dioxide gas as a byproduct. This gas gets trapped in the gluten network of the dough, causing it to expand and rise.
5. Kneading: The Heart of Bread Making
Kneading is a crucial step in bread making as it helps develop the gluten in the dough. Gluten is a protein that gives bread its structure and elasticity. Without proper kneading, your bread may turn out dense and tough rather than light and airy.
6. Patience Pays Off: Letting the Dough Rise
Allowing the dough to rise is essential for developing flavor and texture. During the rising process, the yeast ferments, producing carbon dioxide gas that causes the dough to expand. This results in a light and fluffy loaf with a deliciously complex flavor.
7. Shaping Your Loaves
Shaping the dough into loaves not only makes for a visually appealing finished product but also helps ensure even baking. Take your time to shape the loaves properly, making sure they are uniform in size and shape for consistent results.
8. The Art of Baking
Baking is where the magic happens. As the loaves bake in the oven, they undergo a transformation, turning from raw dough into golden brown masterpieces. The heat of the oven causes the yeast to produce one final burst of gas, creating airy pockets within the bread.
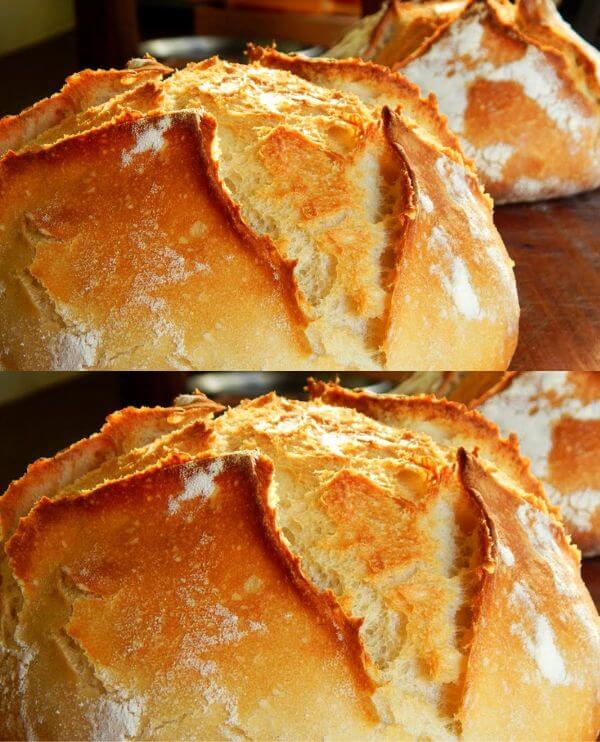
9. Achieving that Golden Brown Crust
The key to achieving a golden brown crust lies in the temperature of the oven. A hot oven encourages rapid expansion in the dough, resulting in a crisp exterior. Additionally, a steamy environment in the oven during the first few minutes of baking helps create a glossy crust.
10. Conclusion
In conclusion, baking homemade bread is a rewarding and enjoyable experience that anyone can master. With just a few simple ingredients and some patience, you can create delicious loaves that will impress family and friends alike. So why not roll up your sleeves, preheat that oven, and get baking?
11. FAQs
11.1 Can I use instant yeast instead of fresh yeast?
Yes, you can substitute instant yeast for fresh yeast in this recipe. Use about half the amount of instant yeast as fresh yeast called for in the recipe.
11.2 My dough isn’t rising. What did I do wrong?
There could be several reasons why your dough isn’t rising, including old or inactive yeast, too much salt inhibiting yeast growth, or not allowing the dough to rise in a warm enough environment.
11.3 Can I freeze the dough for later use?
Yes, you can freeze the dough after shaping it into loaves. Simply place the shaped loaves on a baking sheet and freeze until solid, then transfer them to a freezer bag. When ready to bake, thaw the loaves in the refrigerator overnight, then allow them to come to room temperature before baking.
11.4 How can I add flavor to my bread?
You can experiment with adding various ingredients such as herbs, spices, cheese, or dried fruits to add flavor to your bread. Simply incorporate them into the dough during the mixing process.
11.5 Can I use whole wheat flour instead of white flour?
Yes, you can substitute whole wheat flour for white flour in this recipe, although the texture and flavor of the bread may be slightly different. Whole wheat flour contains more fiber and nutrients than white flour, resulting in a denser loaf. Adjust the amount of water as needed to achieve the desired consistency of the dough.