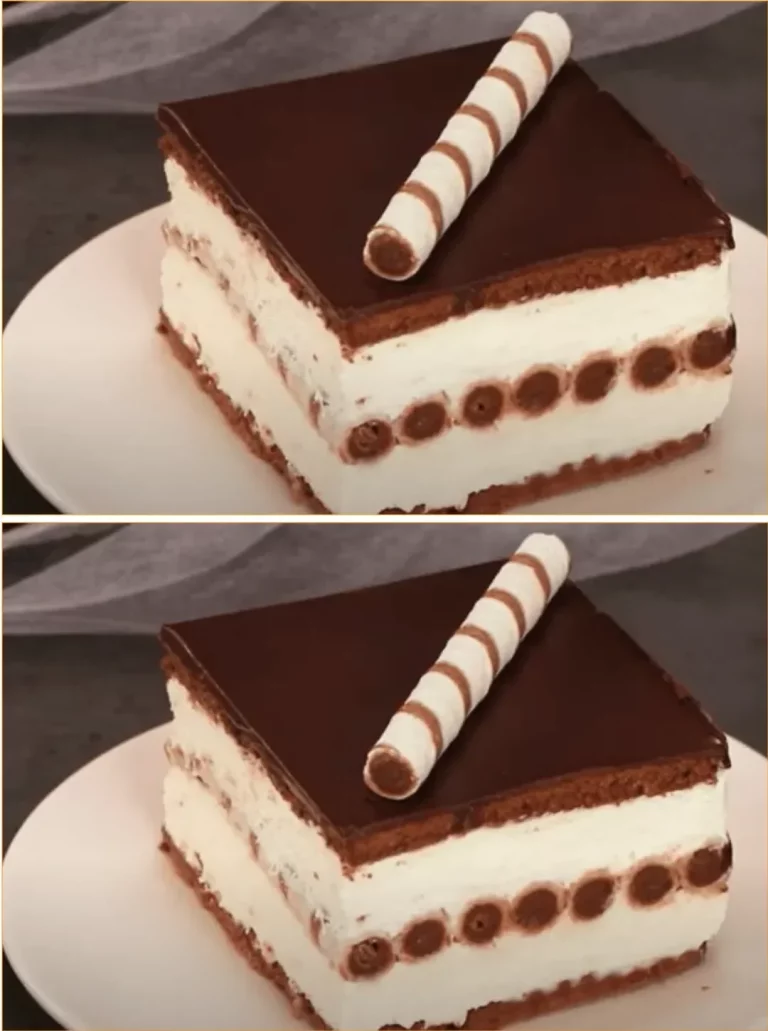
No-bake Wafer Cream Cake with Chocolate Icing is a delightful dessert that’s perfect for any occasion. Its creamy layers of mascarpone and whipping cream, paired with crispy cocoa biscuits and sweet wafers, create a decadent treat that’s easy to whip up without turning on the oven. Whether you’re hosting a gathering or just treating yourself, this cake will surely impress with its rich flavors and gorgeous look.
What You’ll Need for No-bake Wafer Cream Cake with Chocolate Icing
To prepare this delicious dessert, gather the following ingredients:
- 400g mascarpone (14 oz)
- 200g powdered sugar (1 ¾ cups)
- 600g whipping cream (2 ½ cups)
- 5ml vanilla flavoring (1 tsp)
- 250g cocoa biscuits Bebe (8.8 oz)
- Wafers with cream (amount as needed)
- 160g chocolate (5.6 oz)
- 30ml oil (2 tbsp)
Step-by-Step No-bake Wafer Cream Cake Recipe
-
Prepare the Base: Begin by placing the cocoa biscuits on the bottom of your baking dish. Ensure they cover the base evenly for a solid foundation.
-
Mix the Cream: In a large mixing bowl, combine the mascarpone, powdered sugar, vanilla flavoring, and whipping cream. Use an electric mixer to beat the mixture until it’s smooth and creamy.
-
Layer the Cream: Spread half of the creamy mixture over the cookie base, smoothing it out with a spatula.
-
Add Wafers: Arrange the wafers on top of the cream layer, covering it completely.
-
Finish the Layering: Gently spread the remaining cream over the wafers, ensuring it’s evenly distributed.
-
Top with Cookies: Add another layer of cocoa biscuits on top of the cream to create a lovely contrast in textures.
-
Chill: Cover your dish with plastic wrap and place it in the refrigerator for 1 hour. This allows the layers to set and flavors to meld together perfectly.
-
Prepare the Chocolate Icing: While the cake is chilling, melt the chocolate along with the oil in a microwave-safe bowl or over a double boiler, mixing until smooth.
-
Ice the Cake: Once the hour has passed, remove the cake from the refrigerator. Drizzle the melted chocolate icing over the top, using a spatula to spread it evenly.
-
Final Chill: Return the cake to the refrigerator for another hour. This step is essential for the chocolate to set properly.
How to Serve No-bake Wafer Cream Cake with Chocolate Icing
When it’s finally time to enjoy your No-bake Wafer Cream Cake with Chocolate Icing, slice it into generous portions and plate it beautifully. Pair it with a dollop of whipped cream or fresh berries for an added touch. This cake pairs well with a hot cup of coffee or tea, making it a wonderful dessert for any gathering or an afternoon treat.
Recipe Tips & Variations
- Flavor Boost: Try adding some citrus zest to the cream mixture for a refreshing twist. Lemon or orange zest pairs beautifully with the chocolate icing!
- Textural Twist: For added crunch, sprinkle chopped nuts or crushed biscuits between the layers.
- Chocolate Lovers: If you can’t get enough chocolate, consider folding some chocolate chips into the cream mixture for extra chocolate flavor in every bite.
No-bake Wafer Cream Cake FAQs
1. Can I make this cake a day in advance?
Absolutely! In fact, making it a day ahead allows the flavors to develop even more, making each slice even tastier.
2. How do I store leftovers?
Keep any leftover cake stored in an airtight container in the refrigerator. It should last for about 3-4 days.
3. Can I use other types of cookies?
Yes! Feel free to experiment with different flavored cookies or even graham crackers if you prefer.
No-bake Wafer Cream Cake with Chocolate Icing is a simple yet indulgent dessert that everyone will love. With its no-bake method and delightful layers, it’s a perfect choice for any occasion. Go ahead and give it a try—you won’t be disappointed!