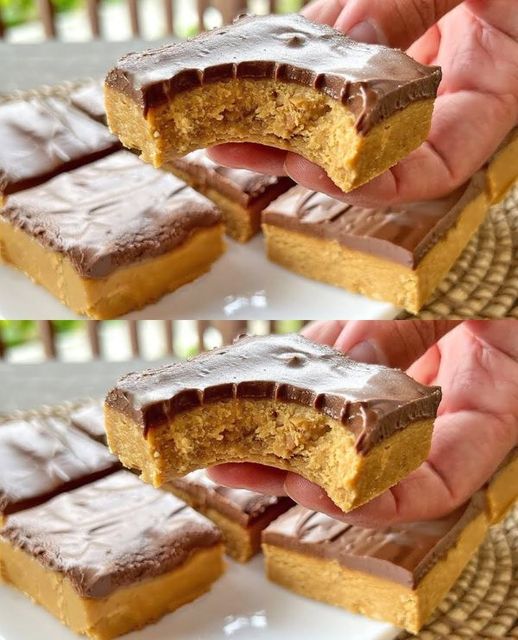
In today’s fast-paced world, finding a nutritious yet delicious snack can be quite a challenge. Most of the readily available options are loaded with sugar and unhealthy additives. However, there’s a fantastic alternative that you can make at home in just five minutes – protein bars! These bars not only satisfy your sweet cravings but also provide a healthy dose of protein without the guilt. In this article, we’ll show you how to create your own protein bars that are not only tastier than Snickers but also free from sugar and baking. Let’s dive into the details.
Ingredients You’ll Need:
For the Base:
- 8.8 ounces (250 grams) of peanut butter
- 3.5-5.3 ounces (100-150 grams) of coconut flour (depending on the desired consistency)
- 1.8 ounces (50 grams) of sweetener (choose from honey, maple syrup, or stevia)
For the Glazing:
- 1.8 ounces (50 grams) of cocoa powder
- Coconut milk and sweetener to taste
The Simple Preparation Process:
Step 1: Mixing the Dough
- Start by taking a bowl and adding 250 grams of peanut paste (butter) into it. You can easily make peanut paste at home if you prefer the homemade touch.
- Gradually add 100 grams of coconut flour into the bowl and mix it with the peanut paste. Depending on the desired consistency of your mixture, you can add the remaining 50 grams of coconut flour if necessary.
- Now, it’s time to sweeten the mixture. You have options here – you can use honey, stevia, or maple syrup as a natural sweetener. Add it to the bowl and mix everything thoroughly. The mixture should be thick but still easy to pour into a mold.

Step 2: Molding and Chilling
- Take a mold with a flexible rim; it should be smaller in size since this recipe makes a smaller batch. If you desire more, simply double the ingredients.
- Pour the prepared mixture into the mold and use a spatula to pat it down and level it nicely.
- Cover the mold with cling film and place it in the refrigerator for 2-3 hours to let it cool.
Step 3: Preparing the Glaze
- While your protein bar mixture is cooling in the fridge, you can prepare the glaze. Take 50 grams of cocoa and gradually add a little coconut milk until it forms a runny glaze.
- Adjust the sweetness of the glaze to your liking by adding sweetener. Mix it well.
Step 4: The Final Touch
- Once the protein bar mixture has cooled, remove it from the refrigerator.
- Pour the prepared glaze evenly over the top of the mixture.
- Cut the bars into cubes, and they are ready to be served immediately.
These homemade protein bars not only taste amazing but also provide you with a nutritious snack option. Some even say they are tastier than Snickers! Plus, they are sugar-free and require no baking. What more could you ask for?
Conclusion
In a world filled with unhealthy snacking options, making your own protein bars is a game-changer. They are easy to prepare, healthier than traditional candy bars, and customizable to your taste preferences. Next time you’re craving a sweet treat, whip up a batch of these protein bars and enjoy guilt-free snacking.
FAQs
- Are these protein bars suitable for vegans? Absolutely! You can use maple syrup or stevia as sweeteners to keep them vegan-friendly.
- Can I add nuts or dried fruits to the mixture for extra flavor? Certainly! Feel free to customize your protein bars with your favorite nuts, dried fruits, or even dark chocolate chips.
- How long can I store these protein bars? You can store them in an airtight container in the refrigerator for up to two weeks.
- What’s the protein content in these bars? The exact protein content may vary based on the ingredients you use, but they are generally a good source of protein.
- Can I use almond butter instead of peanut butter? Yes, you can substitute almond butter for peanut butter if you prefer or have allergies.
