Are you tired of the same old routine of buying bread from the store? Do you crave the aroma of freshly baked bread but lack the fancy oven? Well, fret not, because we’ve got just the solution for you! Imagine the satisfaction of sinking your teeth into warm, homemade bread without the hassle of an oven. Yes, you heard it right – we’re talking about bread that’s simple to make, incredibly delicious, and requires just a handful of basic ingredients you probably already have in your pantry. So, roll up your sleeves and get ready to embark on a culinary adventure like never before!
Introduction
Say goodbye to store-bought bread and hello to homemade goodness! In this article, we’ll guide you through the simple steps of making bread without an oven. With just a few basic ingredients and a pan, you can enjoy fresh, warm bread straight from your kitchen.
Gathering Ingredients
To embark on your bread-making journey, you’ll need the following ingredients:
- Plain Flour: 400 grams
- Water: 220 milliliters
- Instant Yeast: 6 grams
- Sugar: 2 teaspoons
- Salt: 1 teaspoon
- Cumin: 1 teaspoon
- Vegetable Oil: as needed
Mixing the Dough
- STEP: Begin by mixing warm water with sugar and instant yeast. Stir until the yeast is dissolved.
- STEP: Sift plain flour into the yeast mixture, then add salt and cumin. Knead the ingredients by hand until a thick, sticky dough forms.
Kneading and Rising
- STEP: Grease your work surface and hands with oil to prevent sticking. Knead the dough until it becomes smooth and elastic.
- STEP: Place the dough in a greased bowl, cover it, and let it rise in a warm place for about an hour until it doubles in size.
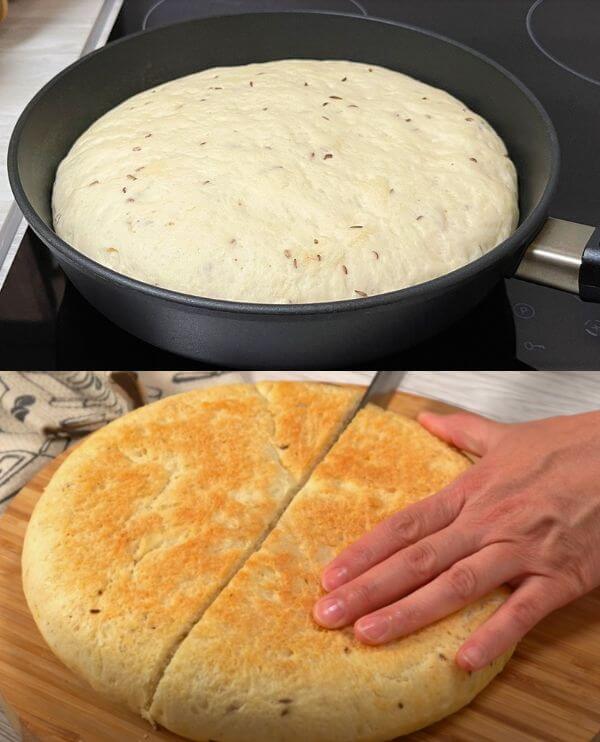
Preparing the Pan and Dough
- STEP: Grease a large pan with oil and transfer the risen dough into it.
- STEP: Spread the dough evenly over the surface of the pan using your fingers. Cover the pan with a towel and let it rest for another 30 minutes.
Pan-Frying the Bread
- STEP: Place the pan on the stove over low heat and cover it with a lid. Allow the bread to fry until golden brown on the bottom.
- STEP: Once the bread comes off the bottom of the pan easily, flip it with the help of a plate and cook the other side until golden brown as well.
Serving and Enjoying
Congratulations, your bread is ready! Remove it from the pan, let it cool for a bit, and serve it just like you would regular bread. Whether you enjoy it plain, with butter, or alongside your favorite dish, this homemade creation is bound to delight your taste buds!
FAQs
Q: Can I use whole wheat flour instead? A: Yes, you can substitute plain flour with whole wheat flour for a healthier alternative. However, keep in mind that the texture and flavor may vary slightly.
Q: Can I add other spices for flavor? A: Absolutely! Feel free to experiment with various spices and herbs to customize the flavor of your bread according to your preferences.
Q: Can I make this bread gluten-free? A: While this recipe calls for plain flour, you can try using gluten-free flour blends for a gluten-free version. Adjustments may be needed for the texture and rising process.
Q: How long does the bread stay fresh? A: Homemade bread is best enjoyed fresh on the day it’s made. However, you can store any leftovers in an airtight container at room temperature for up to 2-3 days.
Q: Can I freeze the dough for later use? A: Yes, you can freeze the dough after it has risen. Simply wrap it tightly in plastic wrap and store it in the freezer for up to a month. Thaw it in the refrigerator overnight before using it.