Introduction
Bread making is an art form that has been cherished for centuries, providing comfort and nourishment across cultures. The aroma of freshly baked bread wafting through the house is a joy that everyone should experience. Today, we present a recipe that simplifies this traditional craft, making it accessible to anyone, regardless of their baking experience. Our Faster No Knead Bread is designed to be effortless and quick, eliminating the need for boiling water and complex techniques. This recipe ensures you can enjoy a delicious homemade loaf with minimal effort.
A Brief History of No Knead Bread
The concept of no knead bread was popularized by Jim Lahey of Sullivan Street Bakery in New York. His method, introduced in the early 2000s, revolutionized home baking by showing that high-quality bread could be made with minimal hands-on time. The technique relies on a long fermentation process to develop gluten and flavor, rather than the traditional kneading process. Our adaptation speeds up this method, making it even more convenient without sacrificing taste or texture.
Ingredients
- 3 cups (360-390 g /12 3/4 ounces) all-purpose or bread flour (aerate flour before measuring – See How)
- 1/4 teaspoon yeast, active dry or instant (1 g)
- 1 teaspoon salt (6 g)
- 1 1/2 cups hot water, not boiling (354 mL) – I use hot tap water – about 125-130° F
- About 2 tablespoons extra flour for shaping
Instructions
Step 1: Combine Dry Ingredients
In a large bowl, combine the flour, yeast, and salt. It’s crucial to aerate the flour before measuring to ensure the correct amount and to avoid a dense loaf. Stir these dry ingredients until they are thoroughly mixed.
Step 2: Add Water and Mix
Slowly add the hot water to the dry ingredients. Stir until the mixture is well combined. The dough should be shaggy and sticky. Cover the bowl with plastic wrap and let it stand at room temperature for 3 hours. This rest period allows the dough to rise and develop its characteristic bubbles and puffy texture.
Step 3: Shape the Dough
After 3 hours, the dough will have risen significantly and be dotted with bubbles. Transfer it to a well-floured surface. Sprinkle a little extra flour on top to make it easier to handle. Using a scraper or your hands, fold the dough over itself 10-12 times to shape it into a rough ball.
Step 4: Prepare for the Second Rise
Place the shaped dough into a bowl lined with parchment paper (not wax paper). Cover it with a towel and let it stand on the countertop for about 35 minutes. This second rise helps the dough relax and improves the texture of the final loaf.
Step 5: Preheat the Oven and Dutch Oven
While the dough is resting, place a Dutch oven with its lid into a cold oven and preheat to 450° F (230° C). This preheating process takes about 35 minutes, which aligns perfectly with the dough’s second rise. The Dutch oven’s high heat is essential for creating the perfect crust.
Step 6: Bake the Bread
Once the oven has reached 450° F, carefully remove the hot Dutch oven using oven gloves. Lift the parchment paper with the dough and place it gently into the hot pot. Cover with the lid and bake for 30 minutes. This initial baking period allows the bread to rise fully and the crust to start forming.
Step 7: Finish Baking
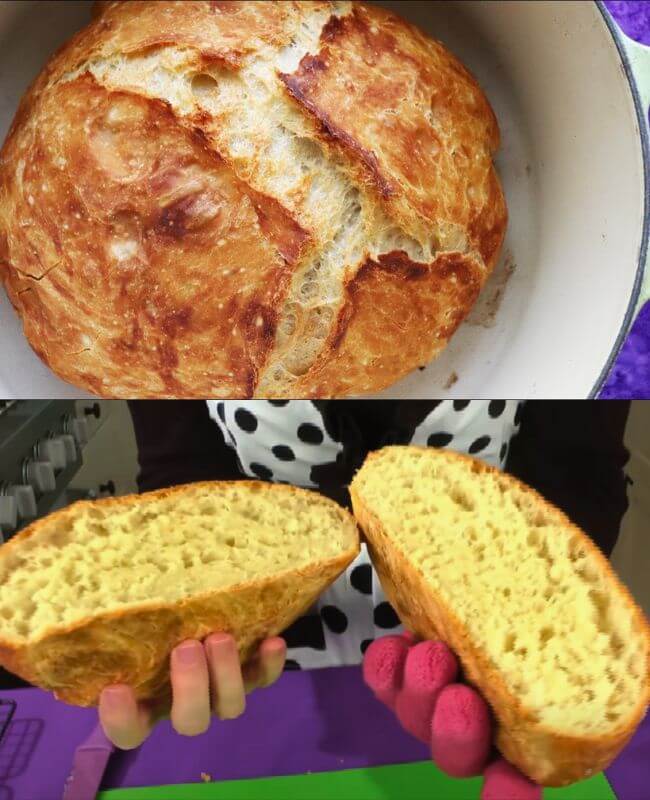
After 30 minutes, remove the lid and the parchment paper from the Dutch oven. Return the bread to the oven, uncovered, and bake for an additional 10-15 minutes. This final baking period browns the crust to a beautiful golden color. Let the bread cool for at least 15 minutes before slicing to ensure the interior sets properly.
Metric Conversion Note
The standard for weighing flour is typically 1 cup = 120 grams. However, due to variations in measurement techniques, you may find that 1 cup weighs 125-130 grams. Adjust according to your preference to achieve the best results.
Tips for Perfect No Knead Bread
- Aerate the Flour: Use a spoon to fluff up the flour before measuring to avoid a dense loaf.
- Use a Scraper: A dough scraper is helpful for handling the sticky dough during shaping.
- Parchment Paper: Ensure you use parchment paper to line the bowl and the Dutch oven to prevent sticking.
- Hot Water: The water should be hot but not boiling, ideally between 125-130° F, to activate the yeast without killing it.
Enjoy the simplicity and deliciousness of homemade bread with this no knead recipe. Whether you’re a novice baker or an experienced chef, this recipe is sure to become a staple in your kitchen.